The route at a glance
This route belongs to Esbat of the Crane Moon. The name document, the private residence containing the seal, and the university room where you confront the professor are separate stops.
- Possess a Scholar in the university courtyard, listen to the three-person conversation, then possess a Loafer for the corner tavern lead. Read the upstairs medical diploma there.
- Return to the university area and locate the residence with the red skull-and-blade sign.
- Climb to the attic dissection room and take the Inquisitive Crane’s Seal beside the candles.
- Bring Noa to the professor in the university teaching laboratory; cast Nominem and use Aaron to scratch him.
- Progress to night, trigger the university courtyard confrontation, defeat the Amalgam and collect its NUX.
Start with the Scholar and Loafer clues
If you have found the seal but still do not know the Inquisitive Crane’s name, start with the university courtyard investigation. The seal pickup does not replace the original-name evidence in the tavern.
- Go to the university courtyard and possess a Scholar.
- Listen to the three people talking. Their conversation reveals that the professor invited Loafers.
- Find a Loafer and possess him to learn about the pub on a street corner.
- Follow that lead to the tavern, then complete the upstairs document interaction described below.
Find the original name in the tavern
The university investigation points to Loafers delivering corpses to a professor. The quest hint names their meeting place as De Overolle Kroes on Moriaene Steegen; another location banner spells the tavern De Overvolle Kroes.
- Go upstairs in the tavern. Use Aaron to possess a Loafer in the restricted rooms and bring Noa through with him, as shown in Graciefaceplays’ 41:20–42:20 sequence.
- Find the long cloth-covered table beneath the sloping roof, beside the windows. It holds an open book, candles and a framed document.
- Read the medical diploma. Aaron identifies the Scuola Medica Salernitana document; Noa then explicitly confirms the original name Adam Lauderman.
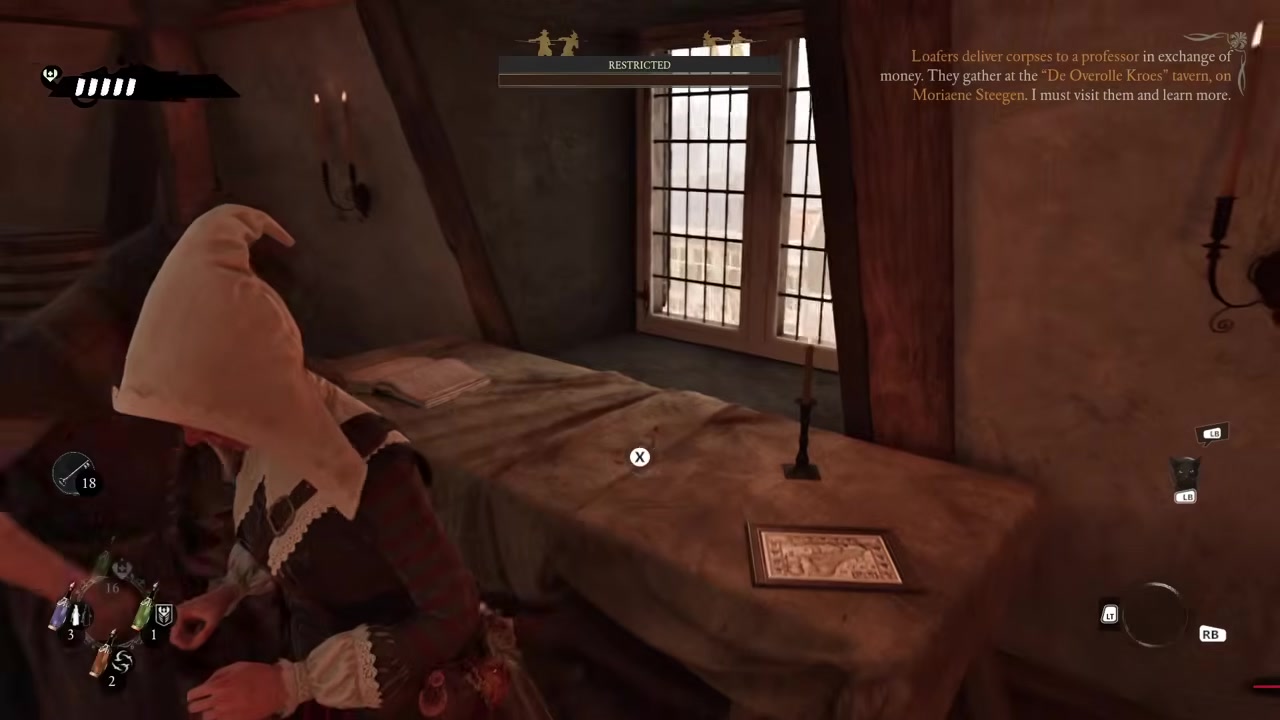
The upstairs table at 42:20. Finish the document interaction until the original-name dialogue appears.
Screenshot: Graciefaceplays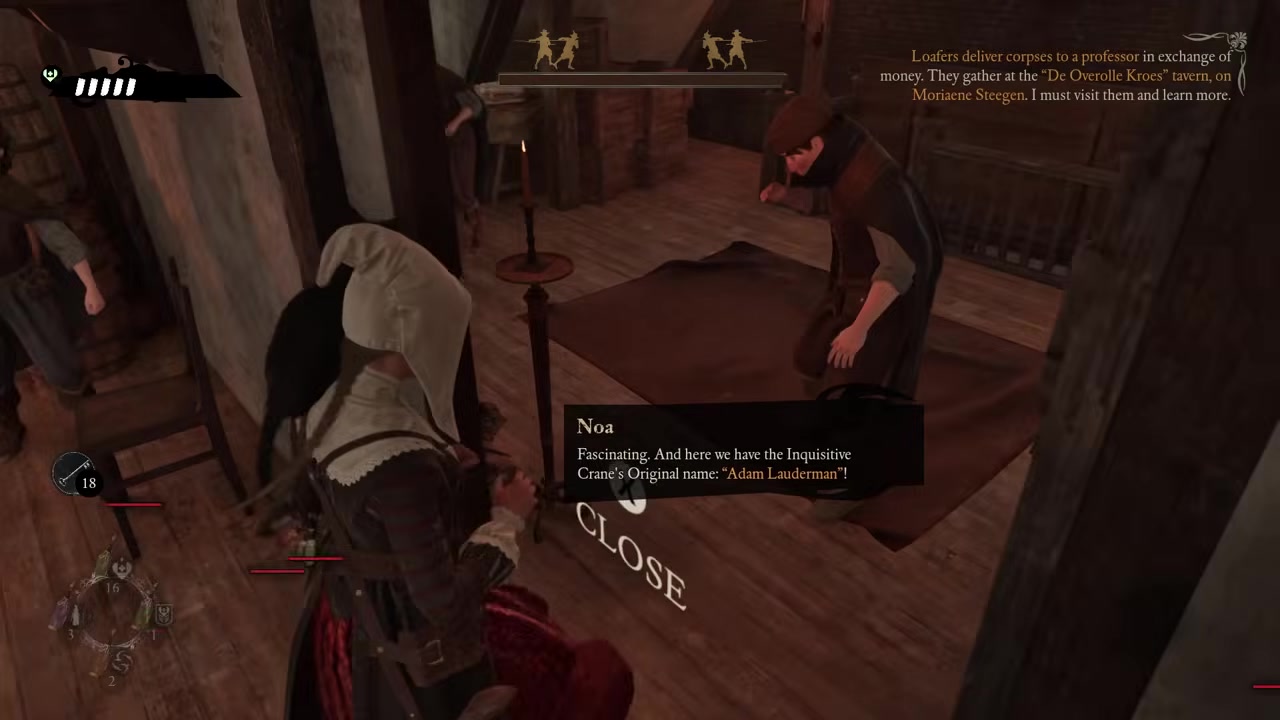
At 42:47, the game confirms Adam Lauderman. Professor Janszoon is an investigation lead, not the original name to substitute here.
Screenshot: GraciefaceplaysLocate the skull-marked residence
The in-game clue places university professors’ residences on Voorburgwal, near Athenaeum Illustre. Look for the red sign showing a skull and a white blade beside a red-brown wooden door, with plant pots nearby. This is the private house you need for the seal.
- Return to the streets beside the university and match the skull-and-blade sign shown below.
- Check the front door. Graciefaceplays opens it as Noa at 43:30–43:34, then switches to Aaron and enters.
- Follow the interior wooden stairs upward, past ordinary living and dining rooms, to the attic with anatomical diagrams and a skeleton.
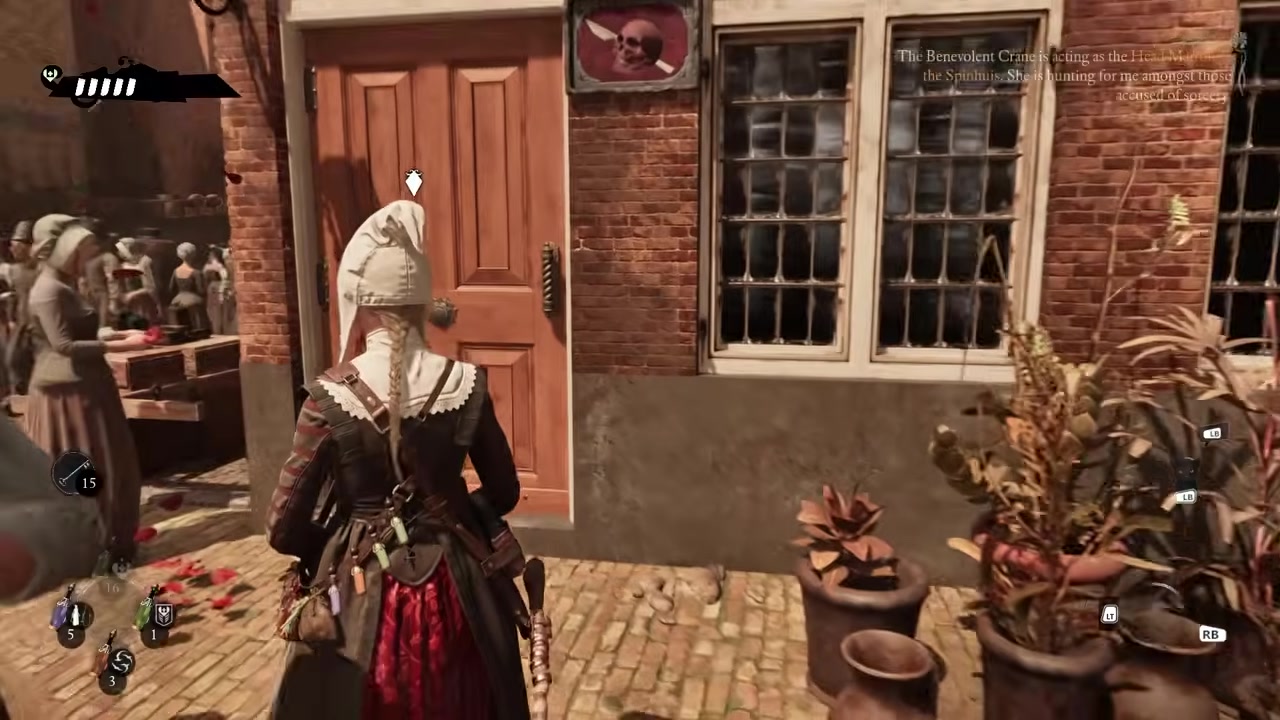
The correct house at 43:30. Match this sign before searching more houses along Voorburgwal.
Screenshot: GraciefaceplaysVisited the pub but still cannot find the house?
The community answer places the skull-and-scalpel house on the same street as the Athenaeum. Use that landmark when the tavern investigation is complete but you are still searching for the residence.
For the related clue, check the two second-floor rooms beneath the professor’s laboratory. The reply points to one of those rooms without identifying which, so inspect both. These rooms are a clue-search area; the seal pickup itself is in the private attic described next.
Take the seal from the attic cabinet
At the top, look for the private dissection room: a sloping roof, anatomical pictures, a skeleton, bloodied work surfaces and surgical equipment. The seal interaction is on the low cabinet beside the candles, next to the bloodied bed or operating surface.
- Approach the candle-side cabinet against the sloping wall. Look for the special interaction shown in the screenshot, rather than stopping after ordinary Search loot.
- Interact and check for the item notification Inquisitive Crane’s Seal.
- Listen for Noa’s confirmation. Once the investigation is ready, she says she can now cast Nominem on the target.
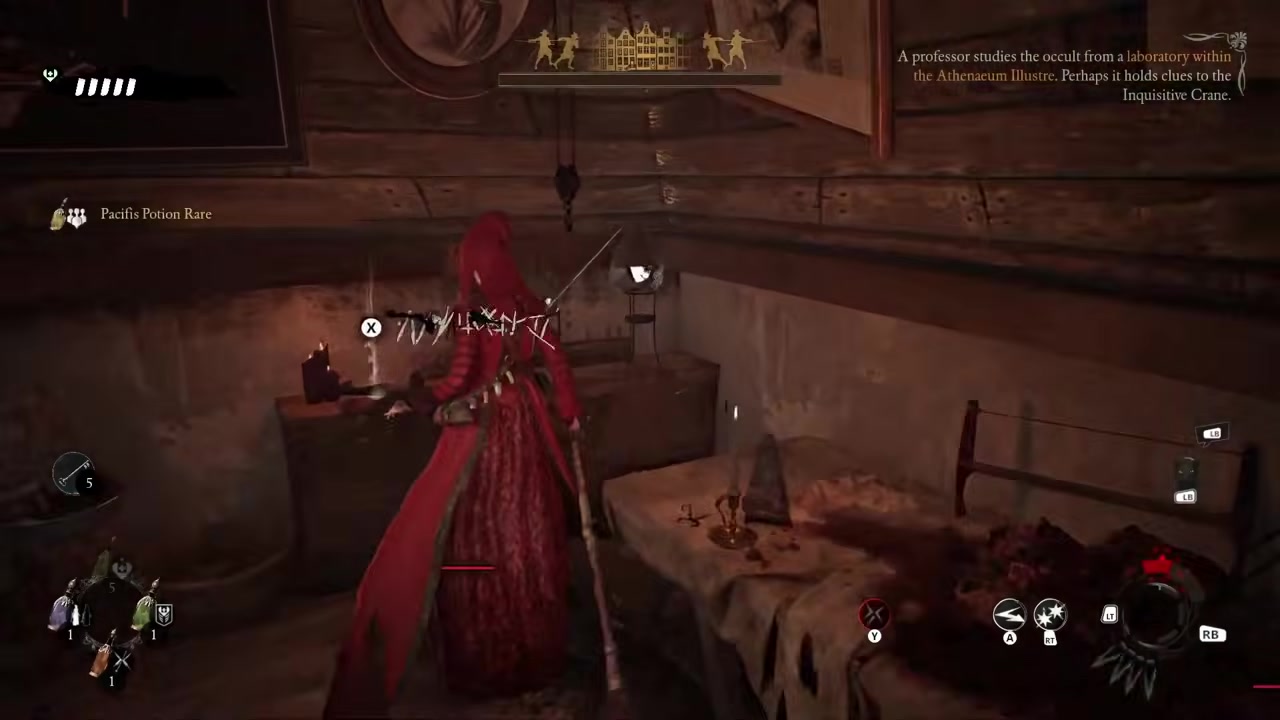
Tonno, 1:33:48: the precise seal interaction. The nearby shelves and surgical remains also produce ordinary loot.
Screenshot: Tonno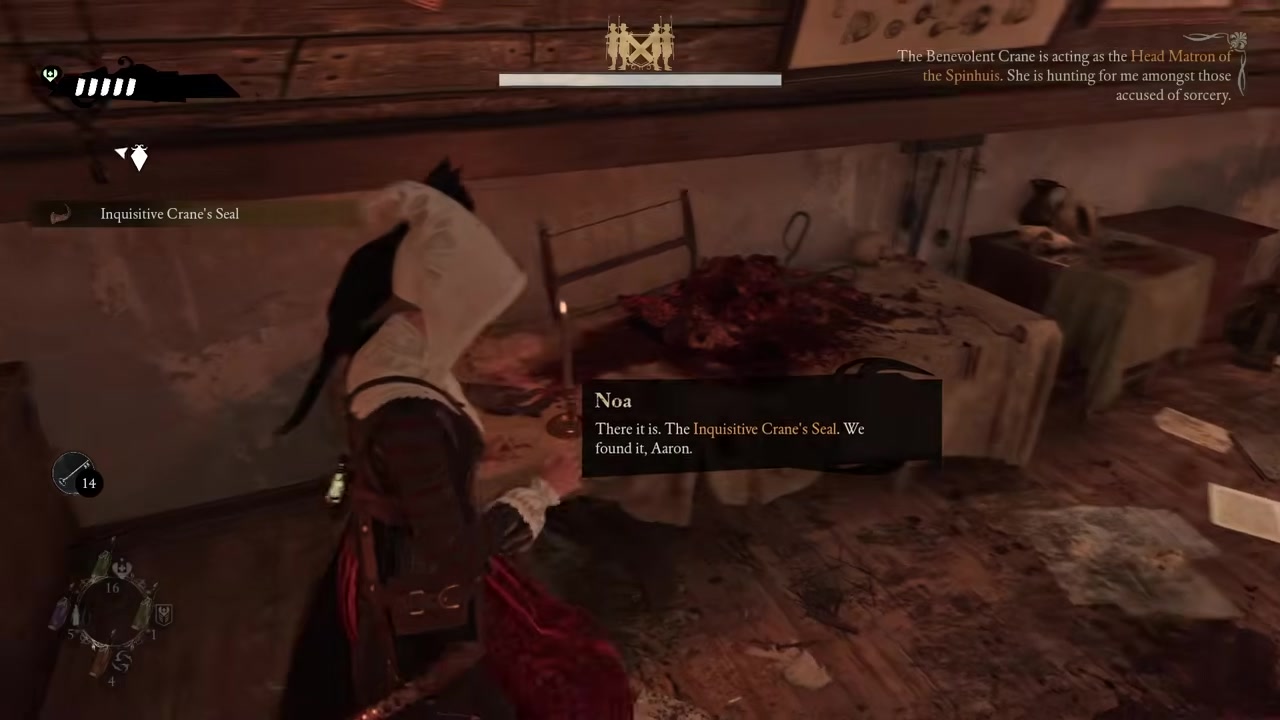
Graciefaceplays, 45:17: the item and dialogue confirm success in the same room.
Screenshot: GraciefaceplaysReturn to the professor and complete Nominem
Return to the upper teaching laboratory in Athenaeum Illustre, where the professor addresses students around a dissection table. This is a different room from the private attic where you collected the seal.
- Bring Noa to the teaching room. The playthroughs show Scholar possession for access, and a cat route through upper windows and roof edges; the roof route is not established as the only entrance.
- Cast Nominem on Adam Lauderman with Noa.
- Use Aaron to scratch the target and complete the breach. Check for Aaron’s confirmation that you can fight Adam Lauderman tonight.
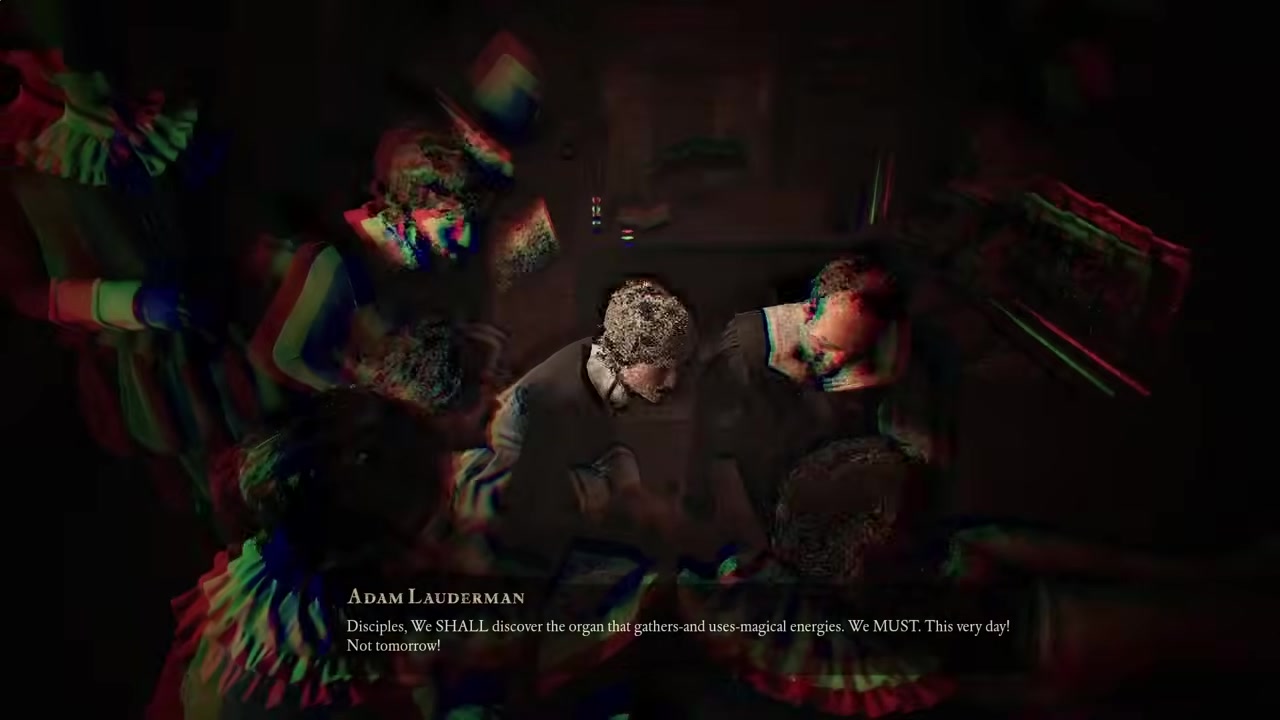
Tonno, 1:58:20: the professor’s teaching scene identifies the target location.
Screenshot: Tonno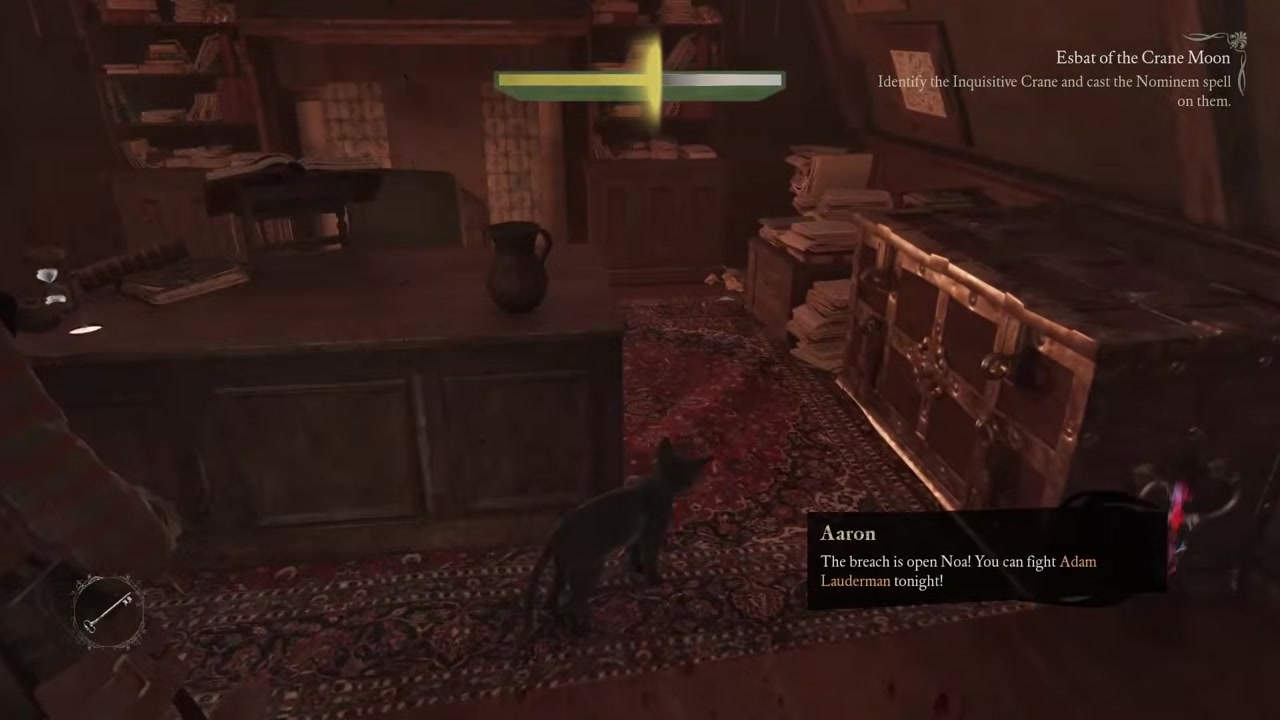
Tonno, 2:00:30: this dialogue is the success check for the daytime spell sequence.
Screenshot: TonnoTrigger the night fight and collect NUX
Follow the main quest into the night phase. Crane Moon also involves the Benevolent Crane: completing this one investigation is not the same as completing the whole Esbat.
- At night, return to the university courtyard and find the Adam confrontation point.
- Use its interaction prompt to trigger the encounter. Defeat the Inquisitive Crane’s Amalgam.
- Complete the NUX collection after the fight, then follow the remaining Crane Moon objectives.
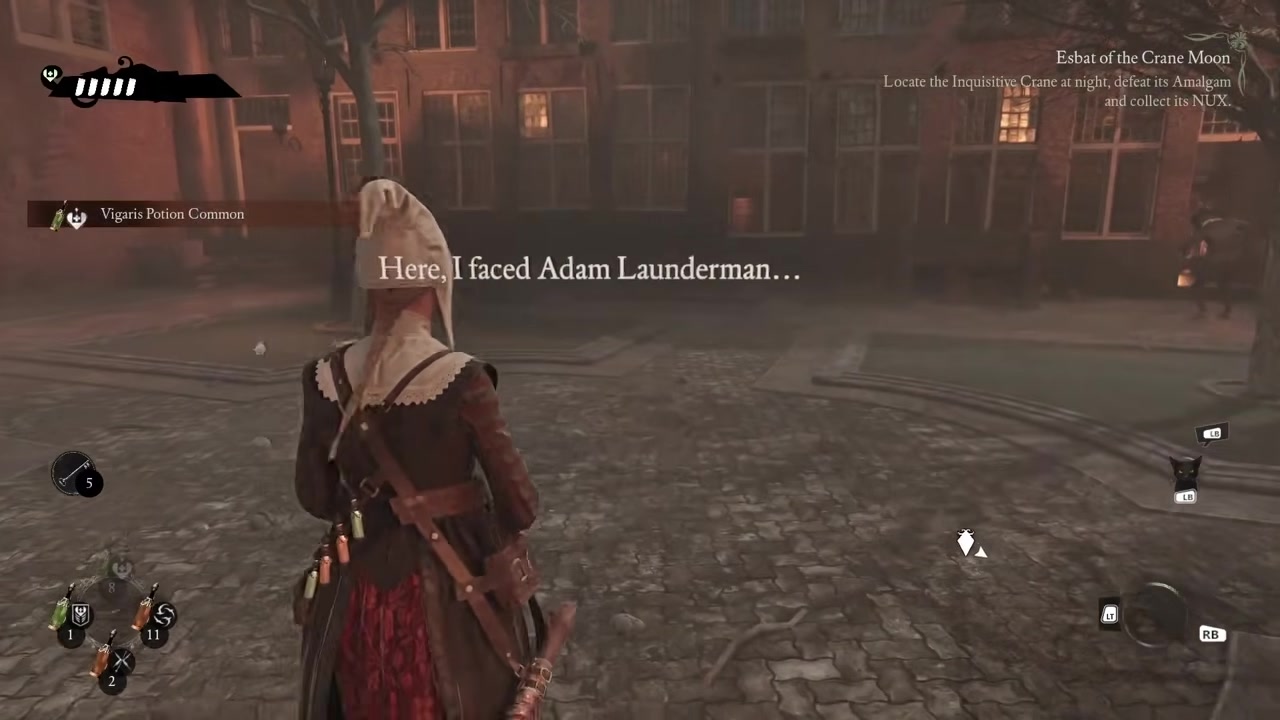
Tonno, 2:15:00: the night encounter location. Its text uses the variant spelling Launderman.
Screenshot: TonnoIf you are still stuck
| What you see | What to check |
|---|---|
| Found the seal, but still missing the name | Follow the courtyard Scholar conversation and Loafer lead, then read the upstairs tavern diploma. |
| The clue mentions Loafers | Find and possess the idle person indicated by the clue to learn about the corner pub. |
| Visited the pub, but cannot find the house | Look along the Athenaeum street for the skull-and-scalpel sign; check the rooms beneath the laboratory for the related clue. |
| Found the professor, but no seal | Leave the teaching laboratory and find the skull-marked private residence. |
| Searched the attic but only received materials | Use the special interaction on the candle-side cabinet; confirm the named seal item. |
| The tracker still shows Benevolent Crane | Check the actual item and dialogue. The recorded seal pickup occurs while the other Crane’s hint is tracked. |
| Unsure whether the spell is finished | Nominem needs Aaron’s scratch. Wait for the explicit tonight/breach confirmation. |
| Learned the name, but cannot cast Nominem | Confirm both the diploma dialogue and named seal pickup, then return Noa to the professor. The thread also reports this symptom after learning the name, but supplies no confirmed fix. |
| Adam Lauderman or Adam Launderman? | The original-name dialogue uses Lauderman; a night encounter label and video chapters also use Launderman. |
Nominem unavailable after learning the name
The original poster later reported being unable to cast Nominem even after obtaining the name and described it as a bug. The discussion gives no resolution or affected game version. The name, seal and target-location checks above help distinguish missing investigation steps from this reported symptom; they are not a verified bug fix.
Also stuck on the Benevolent Crane’s seal?
This is the other Crane investigation discussed in the thread. Go to the prison courtyard and look for the latched door. Reaching the other side opens up another wing of the building to search; do not limit your search to the rooms you have already explored.
A follow-up player confirmed that this hint helped. The reply does not explain the route around the door or the exact seal pickup, so use it as the next exploration lead for Benevolent Crane.
Audit trail
Sources used on this page
August 30 playthrough: tavern/name at 41:20–42:47, residence entrance at 43:30, seal at 45:17 and Nominem readiness at 45:40. Screenshots retain exact timestamps.
Checked September 9, 2026GuideTonno — Full Game Walkthrough, Part 3August 28 playthrough: seal interaction at 1:33:48, laboratory and spell at 1:57:40–2:00:30, night encounter at 2:15:00 and NUX collection at 2:21:40.
Checked September 9, 2026CommunityReddit — Need help from people who have played through FebruaryScholar/Loafer investigation, house landmark and clue rooms, Nominem issue report, and Benevolent Crane prison hint. Route answers verified by the site editor. All 11 visible comments read; the page counter showed 12, with no additional reply exposed after changing sort. No Nominem fix was provided.
Checked September 17, 2026Sources support only the claims described beside them. Independent guides and community reports remain attributed; neither is promoted to an official result.